
Appearance
Studio
Plinthos Studio has everything you need to create custom Content using the elements in your Plinthos Kits. Your custom Content can be used with your Snippets, Signage or exported directly to video for use in social media.
NOTE
Plinthos Studio is not yet available for mobile devices. While the URL is openable, the interface will not scale into a usable state.
Controls
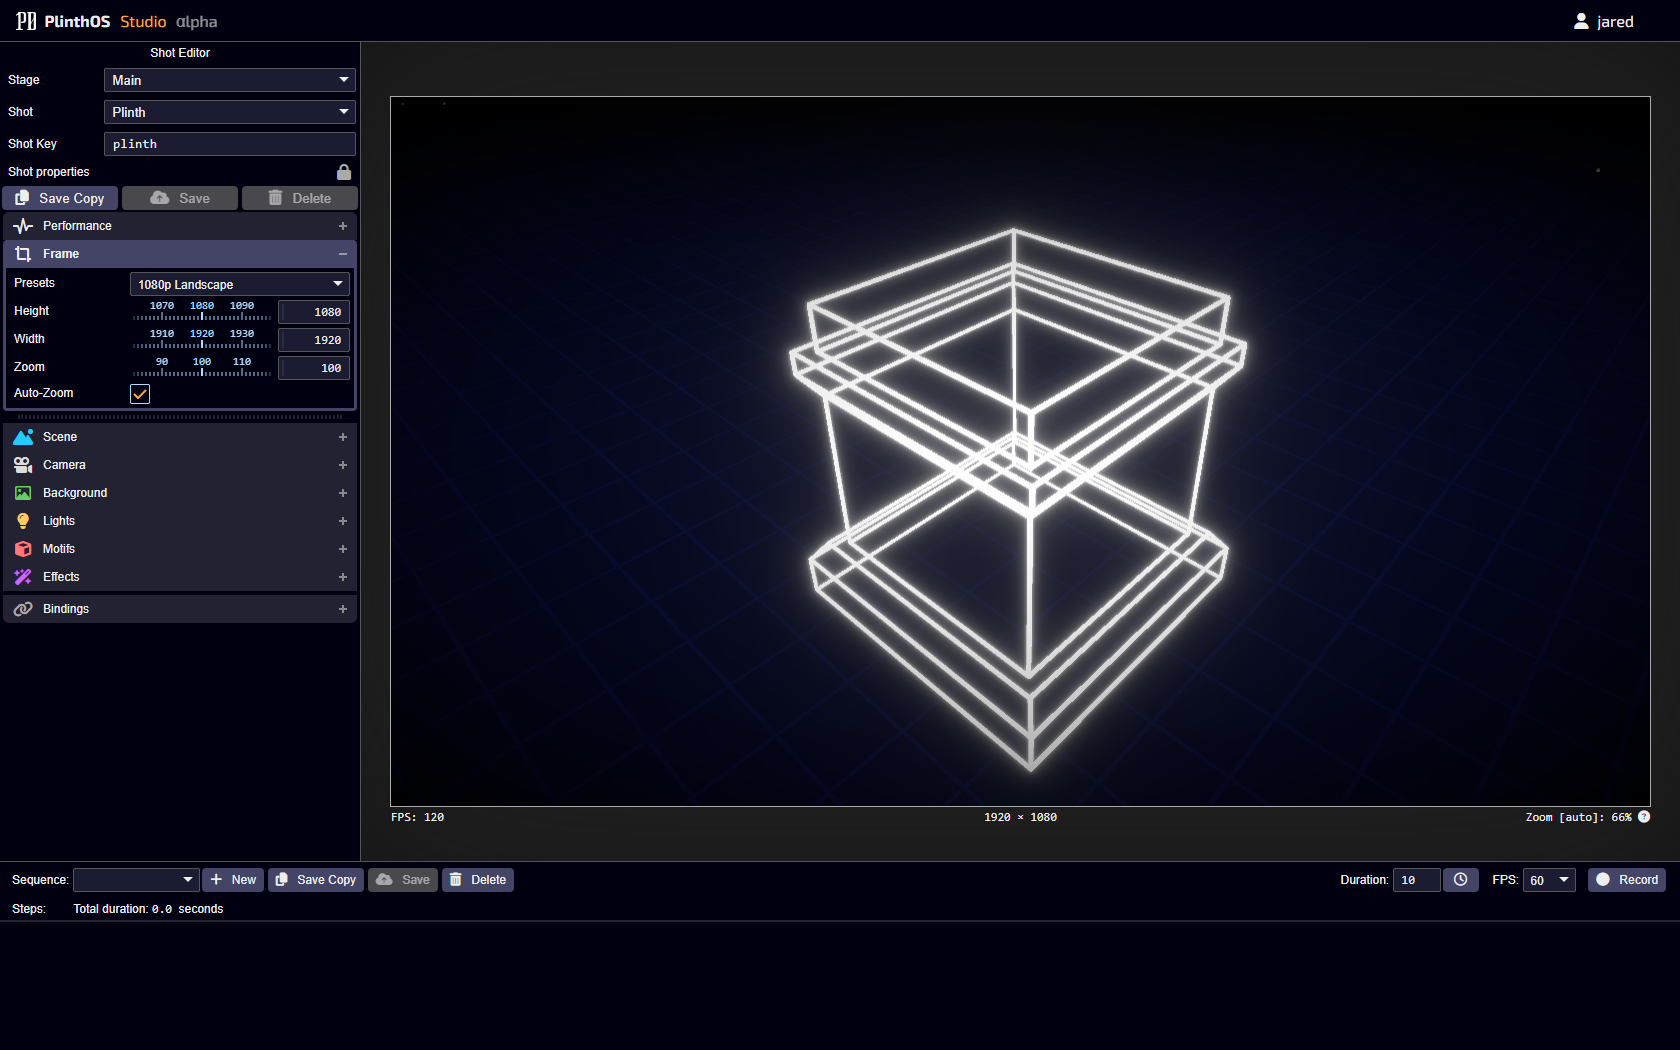
The Plinthos Studio interface is comprised of three main sections: Shot controls, Sequence controls and the preview pane.
Shot controls
The Shot controls are located on the left hand side of the Studio interface.
Descriptions of the controls from top to bottom are as follows:
Stage
The currently selected Stage can be changed from here.
Shot
The currently selected Shot can be changed from here.
Shot Key
The Key of the currently selected Shot.
Shot Properties
Various properties of the selected Shot are displayed here as icons. Hovering over the icons displays what they represent. These properties are coded into the bespoke Shots by Plinth Digital. Saving copies of the Shot will generally not carry these properties over.
Button tray
- Save Copy - Saves a copy of the current Shot in its current form. This is how new Shots are created.
- Save - Saves the state of the current Shot. This button is disabled when a core shot is selected. Copies can always be saved, however.
- Delete - Deletes the current Shot. This cannot be undone!
Frame
Controls for setting the framing of your Shots.
Scene
Controls for altering the entire Stage environment (including things like fog, world orientation, rotation speed etc).
Camera
Controls for altering the camera position, angle, target etc.
Background
Controls for altering the Stage background.
TIP
Some Stages use large Motifs to create more advanced and dynamic background effects. Altering these background objects is managed from the Motifs submenu.
Lights
Controls for altering the lights of the selected Stage.
Motifs
Controls for altering the Motifs in the selected Stage. Active Motifs appear at the top of the list and inactive Motifs appear at the bottom of the list with their icons greyed out.
Effects
Controls for altering the post-processing effects applied to the Stage.
Reactions
Lists buttons that activate Stage Reactions (if there are any calibrated).
Bindings
Controls for directly setting the state of Bindings.
Working with Shots
Shots cannot be created from scratch - instead, new Shots are saved as alterations of existing Shots.
Choose an existing Shot as a starting point and make adjustments to it using the controls in the left hand pane. When you're satisfied with how it looks, click Save Copy.
You will then see this dialog:
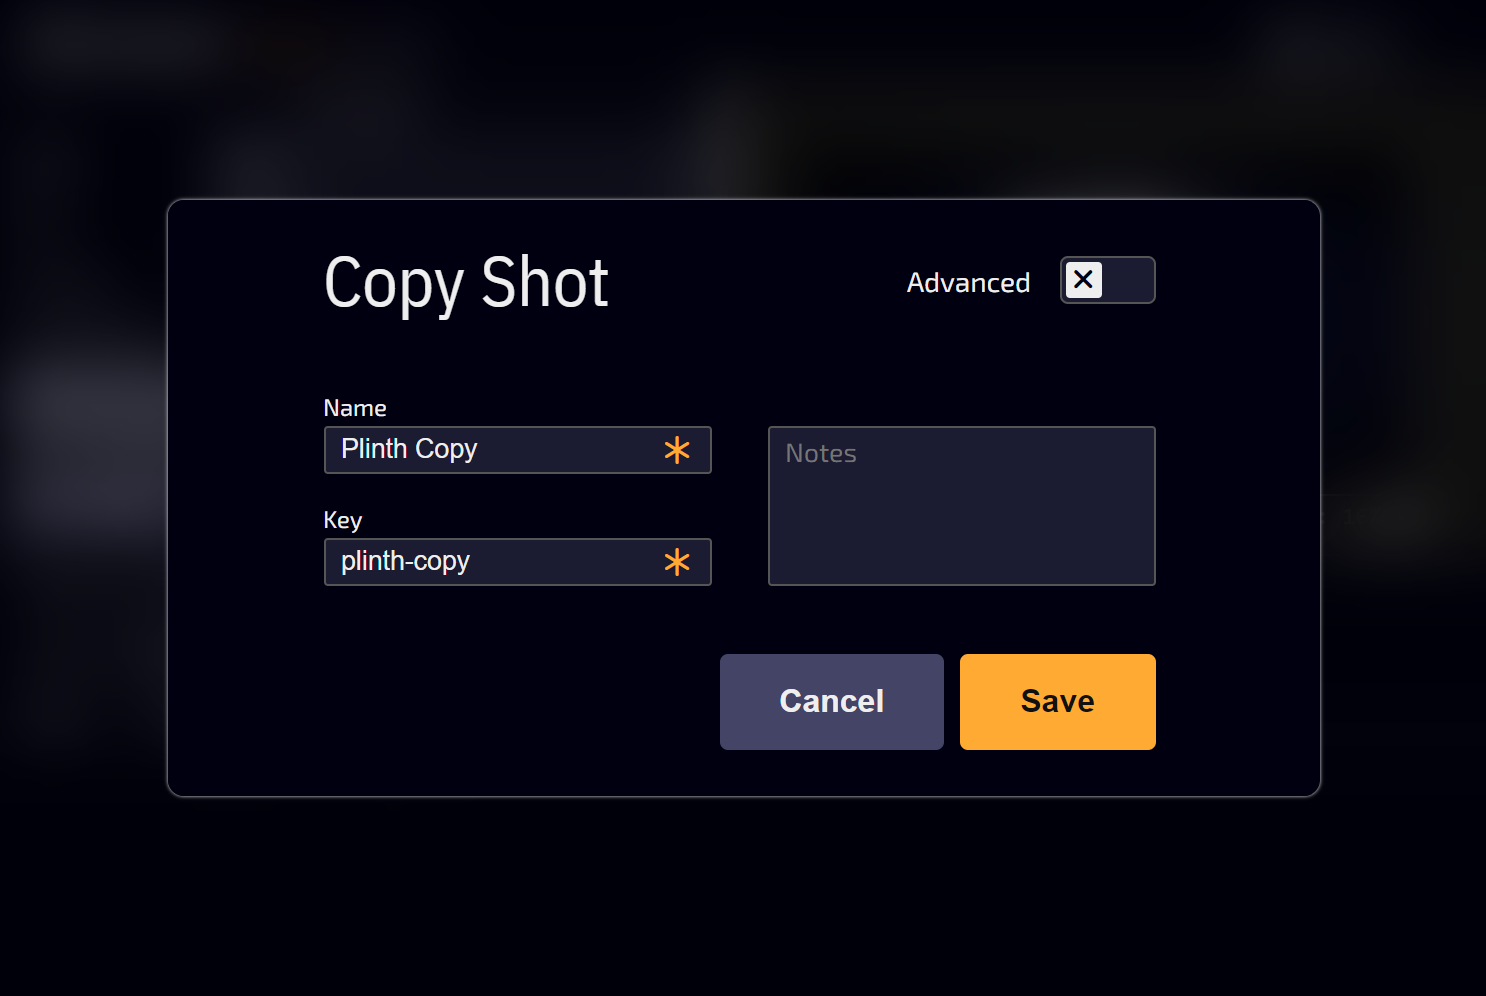
Enter a unique Shot name and Shot Key and click Save.
Your new Shot will now appear under the "User Shots" subheading in the shots menu. It is also available immediately for use with Signage or Snippets.
Your shot can also be used with your Snippets using its key in the same way that any other Shot is used.